Stone Cold DIY Peltier Chilled Vapor Block Kit
Stone Cold – DIY Peltier Chilled Vapor Block
Turn Vapor Into Ice
Stone Cold is a build-it-yourself, Peltier-powered cooling rig that takes your smoking or vaping experience to the next level. At the core is a precision-machined aluminum cooling block made in-house—designed to chill vapor instantly for ultra-smooth, flavorful hits.
The rest is up to you. 3D print the housing. Source the parts. Customize it. Control it. And take your session from warm and harsh to stone cold.
🔧 What You Get
-
CNC-Machined Aluminum Cooling Block Assembly– Made in our shop for maximum thermal conductivity and performance. This will be sold as an assembly with the following parts:
- Cooling Block - Machined out of 6061 Aluminum.
-
Plexi glass front cover.
- Gasket Oring Strip and Oring for 18mm Adapter.
- 18.8mm Adapter for Bubblers and Mouthpieces (titanium)
-
machine screws.
-
Insulator Plate will be made available soon as an option add on.
-
STL Files – Ready-to-print files for the enclosure and chamber components.
3572 - STONECOLD HOUSING - REV 1
3572 - STONECOLD BACK COVER - REV 1
3572 - STONECOLD FRONT COVER - REV 1
-
DIY Parts Guide – Includes Amazon links, wiring diagrams, and clear assembly instruction videos.
❄️ The Cooling Effect
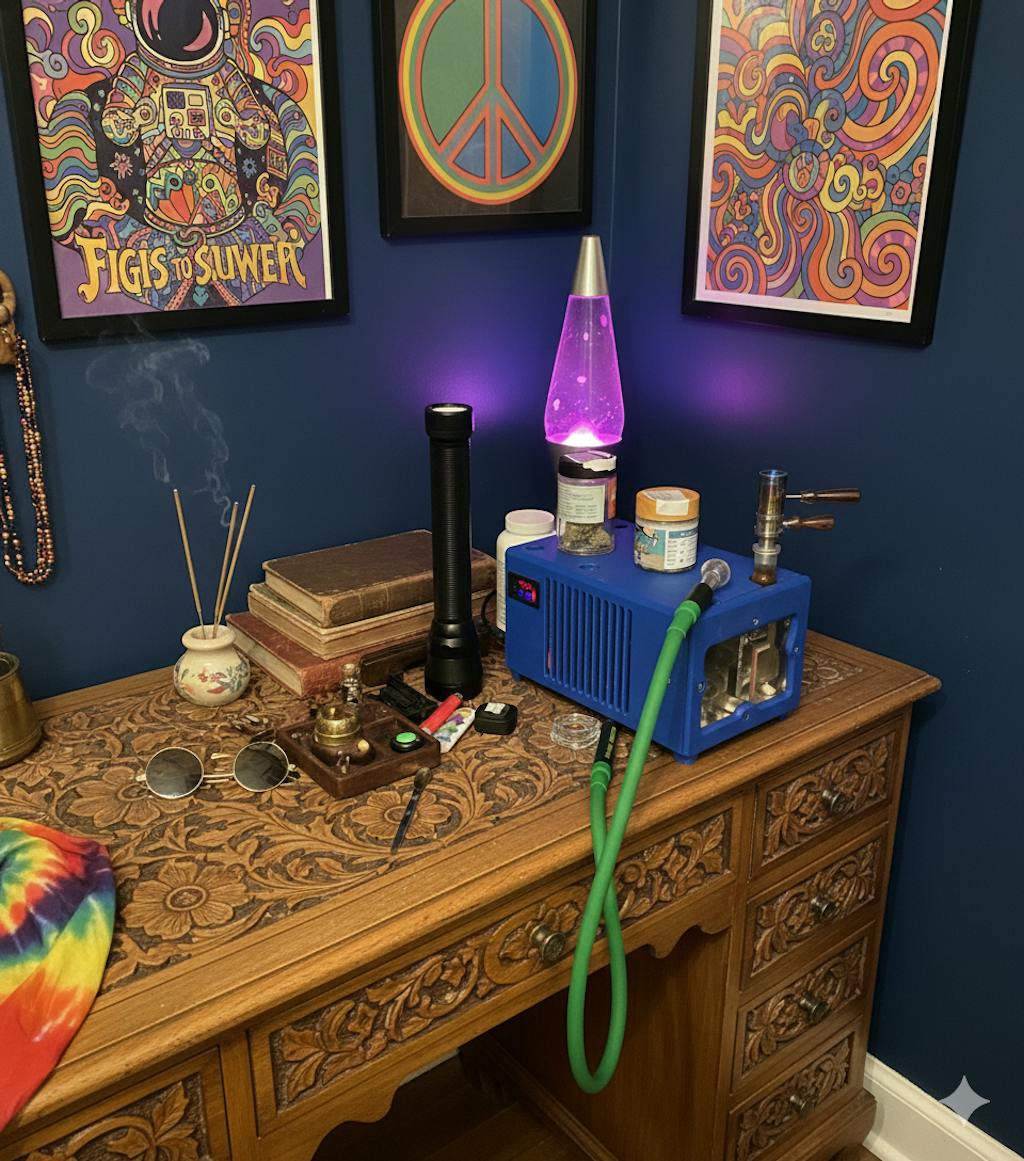
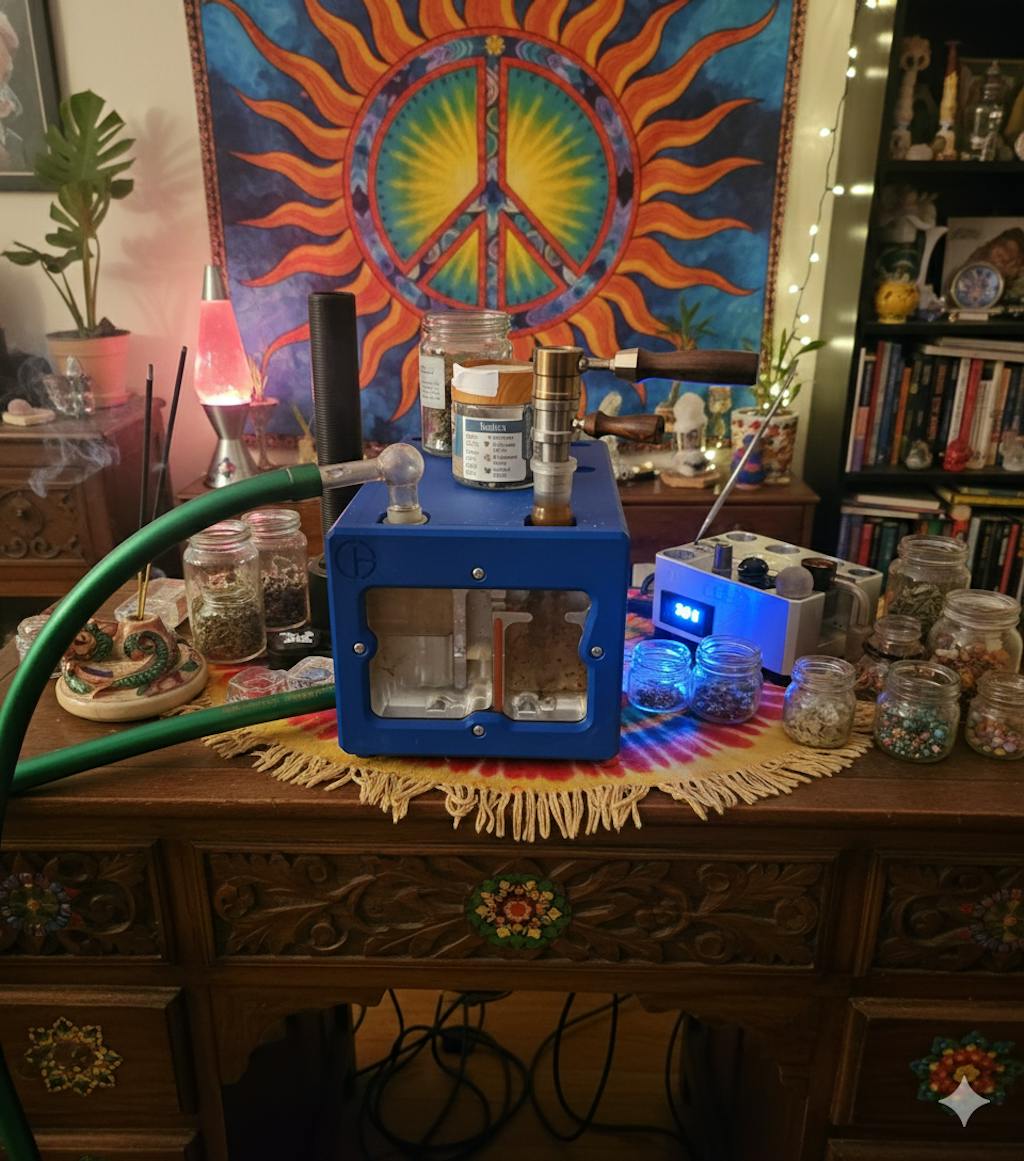
This system uses active cooling is produced by a Peltier module to cool vapor in real time. You can run it dry for intense flavor, add water for classic diffusion, or drop in about 535 x 6mm ruby balls for enhanced cooling and flow. No ice, no dilution—just science doing what it does best.
🛠️ Designed for Modders
-
Standard 14 mm connections – Integrates easily with your existing glass or vaporizer
-
Multi-mode use – Run dry, with water, or ruby balls (or all three)
-
Open-source approach – Build it your way, tweak it, mod it, make it yours
-
Easy maintenance – Designed for disassembly, cleaning, and upgrades
🧠 Who It's For
-
DIYers and makers who love hands-on projects
-
Vape heads chasing the coldest, smoothest pulls
-
Anyone who wants full control over how they cool and consume
⚠️ Not Plug-and-Play
Stone Cold is a project—not a product off a shelf. You’ll need basic tools, some soldering confidence, and a curiosity for thermal science. If that’s you, welcome to the next level.
Customer Reviews
I've owned my Stonecold for about 4 months now, and in that time I've fallen in love with the damn thing, lol. This device has been a game changer for me: I live in a temperate zone, so within a few minutes of being powered on it cools down to 35°F (or more) below the ambient temp. It can then hold it at or near that temp all day, depending on the temperature of your room and other local variables. This is enough to make a noticeable difference in the temp of my hits, and I can feel the difference in my throat. This thing rocks!
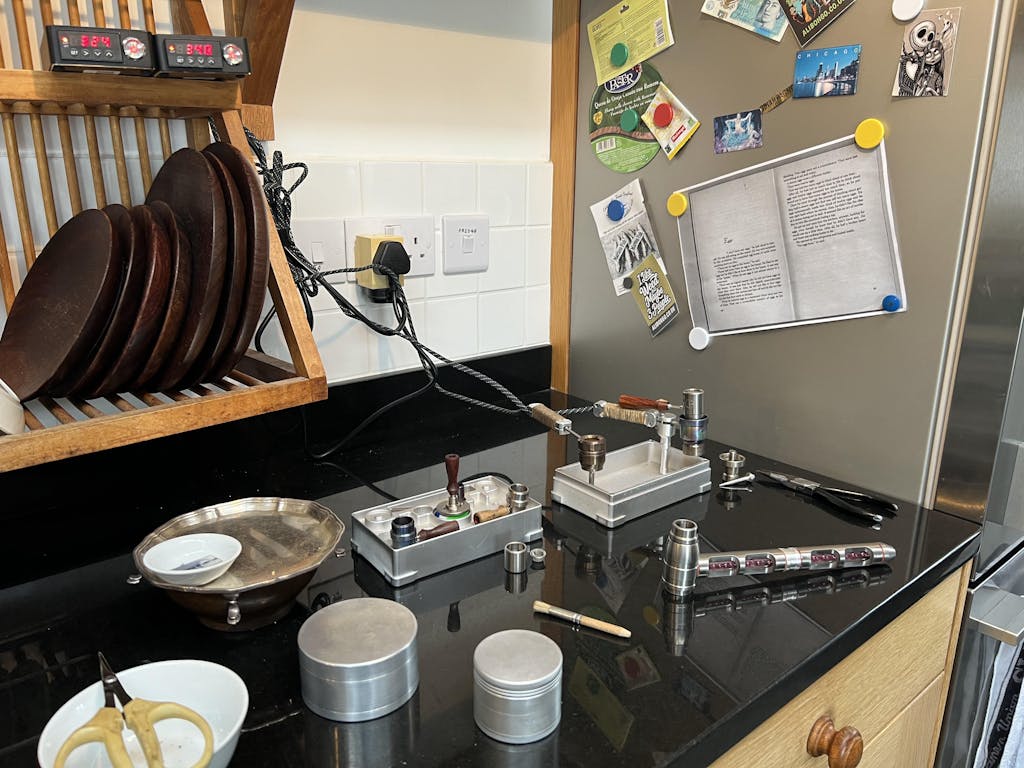
I have been using glass beads (borosilicate, no holes) in place of rubies because a) they also work and b) they're cheap, lol. I'm sure actual thermal rubies work even better, but if you're feeling cheap, know that glass will also work at a fraction of the cost. FWIW, I have 10mm beads in the narrow middle chamber and 6mm beads in the larger third chamber as I found that gives me better airflow than 6mm beads throughout.
Build notes:
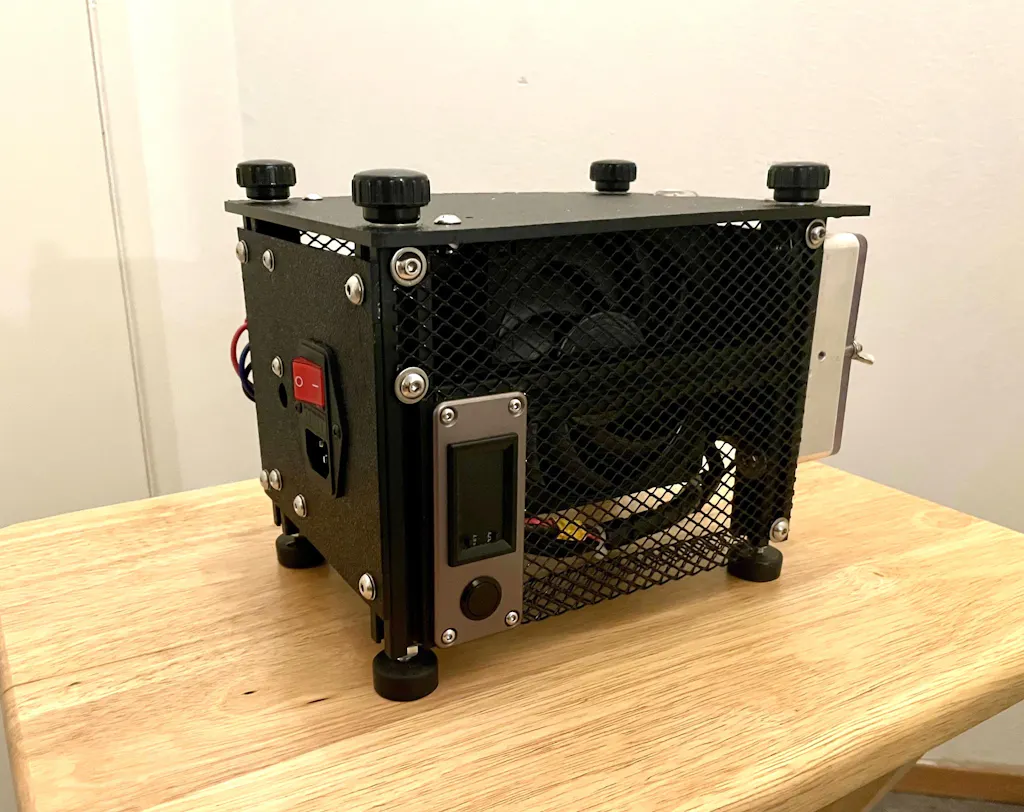
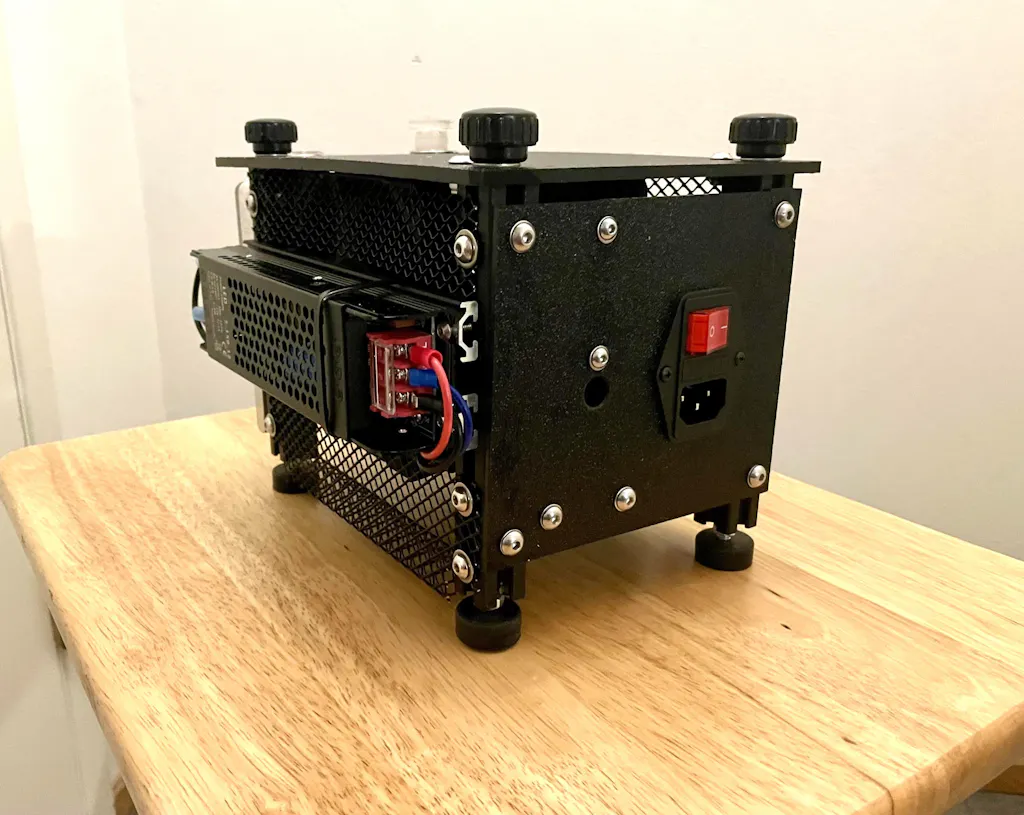
I enjoy building these sorts of projects, so instead of 3D printing an enclosure I made my own design using 2020 extruded aluminum for the frame and expanded screening (from repurposed rain gutter guards) for the side panels.
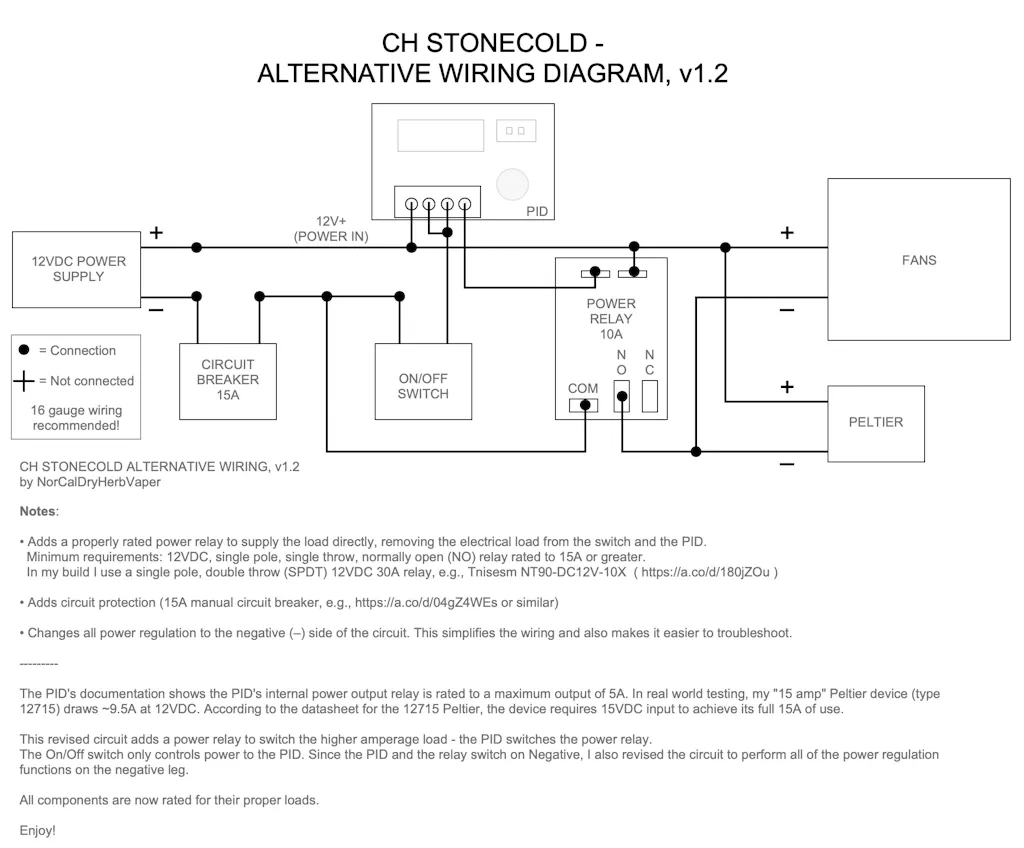
Mine has its power supply hardwired to the electronics and attached to the side of enclosure. Tip: If you do this use a 1500W or greater slim (NOT "ultra slim") LED power supply. A 12.5A PSU is adequate for this application because although Type 12715 "15A" Peltier heaters are rated as 15A, they require a full 15VDC to operate at that current. At 12VDC their draw maxes out at around 9.5A to 10A.
I cannot recommend CH's suggested wiring diagram, as the last version I saw ran all power through the internal relay of the PID controller, which according to the PID's documentation is only rated for 5A! Instead, I recommend using an external relay of 15A or greater, and adjusting the wiring accordingly. The relay I'm using is rated to 30A (search terms: "DC 12V Coil, 30A SPDT (1NO 1NC)"). I am also using a 15A circuit breaker, as to do otherwise feels unsafe, imho.
I have included a copy of my wiring diagram and a few more notes with this review, and suggest using it or something similar. It's presented as-is, but it's been working for me. ;-)
Bottom line: Im my opinion this is a revolutionary device!! It's well worth the money and the effort to source the parts and put it together. Happy to say that in my experience it has worked at least as well as advertised, and maybe even a bit better.
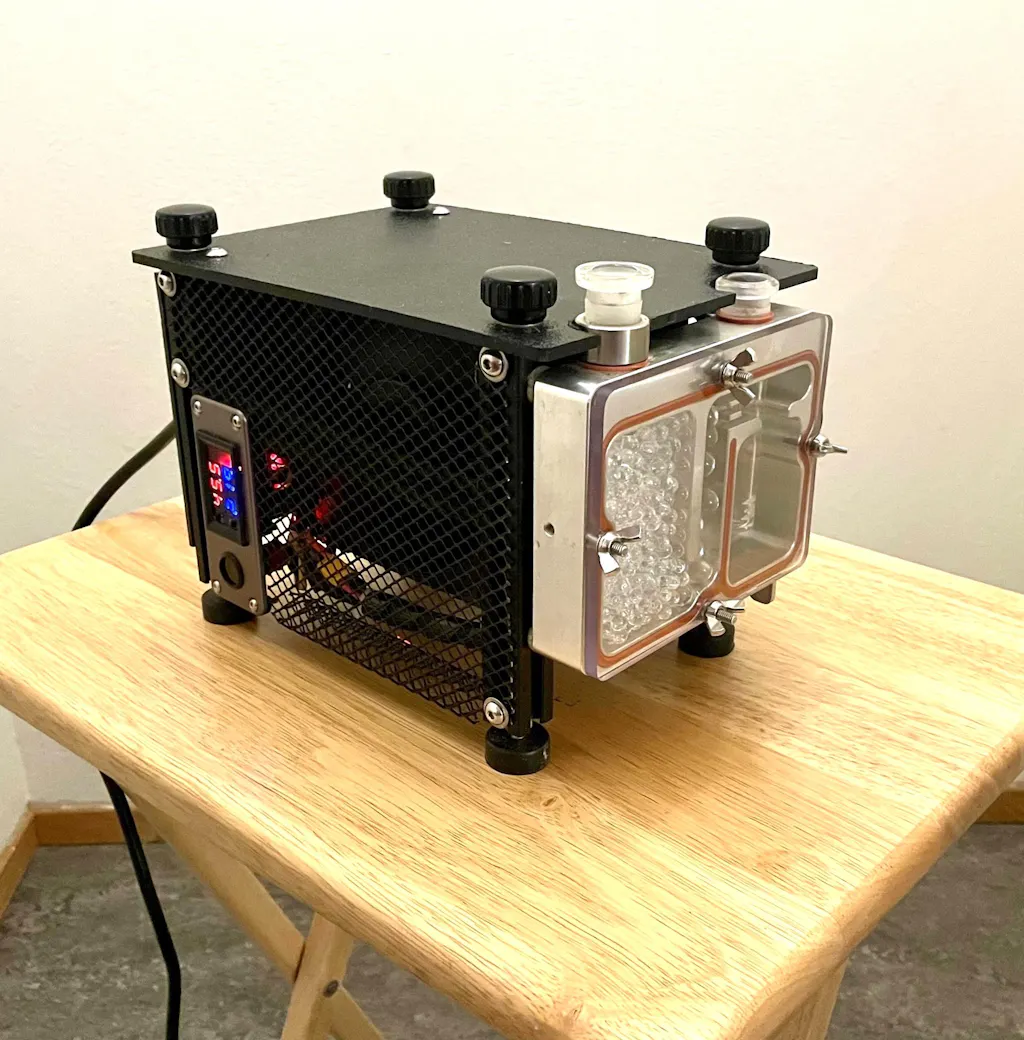
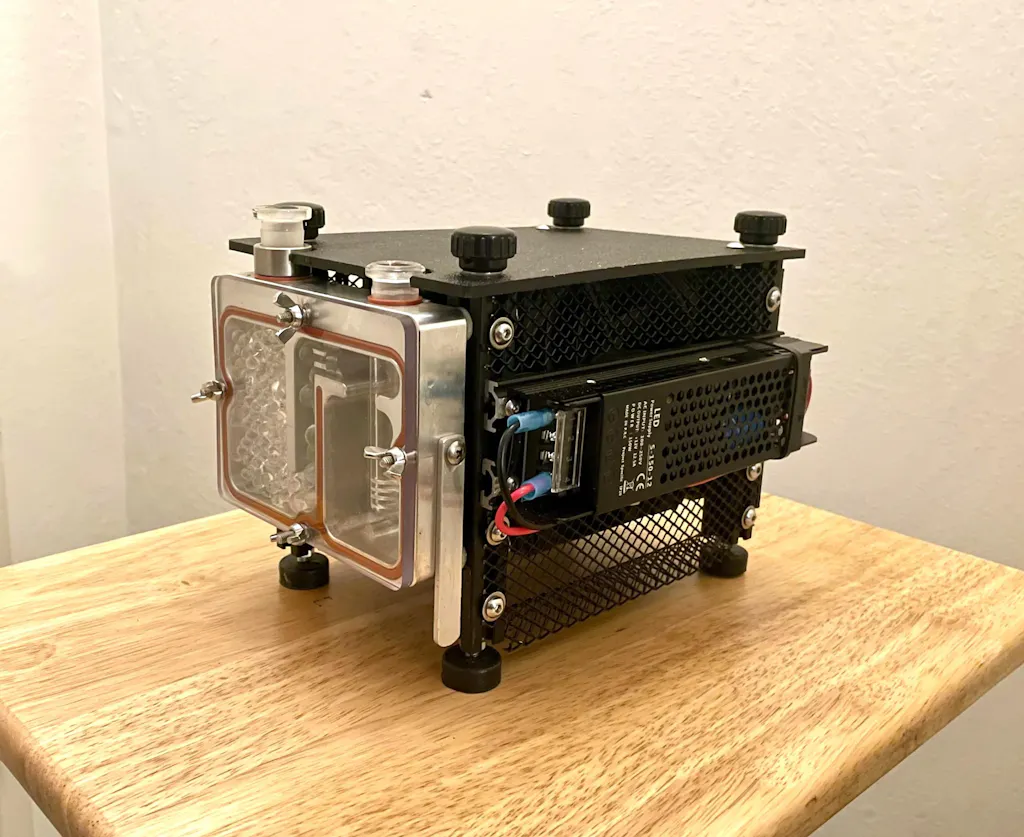
As someone who spends my days as a Product Developer and my nights in a workshop full of CNCs and 3D printers, I have a high bar for DIY engineering. The Stone Cold which I’ve dubbed my custom build, Smoke Chiller 3000 doesn't just meet that bar; it resets it by Cooling the smoke in the block to around 35 to 40°F. And since the block is filled with water, you've effectively created an ice chilled water pipe that stays right above freezing. Killer right! The dilemma with ice is it melts within two or three hits when put in a waterpipe. It also solves the convenction heating dilemma of burning one's throat. The Problem with convection heating pipes is the Thermal Irritation. Even with top tier convection hardware like the Storz and Bickel ecosystem or the Cannabis Hardware Flowerpot, "hot lung" and throat irritation are the primary bottlenecks to a premium experience. The Stone Cold is the definitive solution, utilizing active cooling to strip the caloric heat from the vapor path before it ever reaches the user. I’ve prototyped this unit in two cases to test thermal and structural trade-offs: Chassis A is my daily driver and is printed in blue ABS-GF (Glass Fiber Reinforced). The dimensional stability is perfect for the heat-soak areas near the Peltier. Chassis B dubbed the tank is Printed in Polycarbonate (PC) for those who want maximum impact resistance and a high glass transition temperature. For the thermal Core: I’m running a Peltier 12715 module paired with a 120mm high-static-pressure CPU cooler. Both mentioned in the BOM. This isn't just passive heat dissipation; it’s active refrigeration for your vapor. For my output: I’ve integrated a Stündenglass hose, and the tolerances are spot-on. It creates a perfect seal that feels like an OEM peripheral. The designer did an incredible job with this project and it's super easy and requires no electrical wiring experience. For a professional internal finish without a soldering iron, I recommend using male-to-female jumper wires to bridge the CPU fans to the Wago connectors. So add male to female jumper wires to your BOM. The male pins seat perfectly into the fan’s PWM/DC headers, while the stripped leads secure into the Wagos for a modular, high-current-capable connection. I’m currently engineering a power-off delay circuit. This keeps the 120mm fans active for a 60-second cooldown cycle post-session to prevent the Peltier from heat soaking the internal housing. The designer did an incredible job on the instructions and BOM. It’s "adult Legos" at its finest. However, for those of us with a desktop CNC (I’m running a Carvera), I’d love to see the STEP files for the Insulator Plate made available. I would gladly pay for a "digital-only" license to machine my own plate. Also please consider selling the step file for the stone cold block. I'd love to machine one myself. Final Verdict If you own a 3D printer and value your throat, this is a mandatory build. It’s a "mod-to-the-moon" platform that delivers ice-cold dabs and smooth flower hits every single time. Stay frosty. - Forrest
Not yet tested but -
i) I’m loving CH reels showcasing this next level new vapour cooler
ii) hoping y’all continue the good work to point of production of plug and play Stone Cold units ready to go out of the box
Happy daze